Rediscover film – Get yourself started in film photography
The reignited popularity of film is growing, and it’s so cool to see more of the old cameras out of their bags and in the hands of excited photographers rediscovering the beauty of film. So we’ve put together a few tips on what you should know about beginning your journey with film photography.
Firstly, this need not be an expensive experiment. There are so many old film cameras around on trade me, garage sales, ebay and in people’s cupboards (ask a grandparent!) that all you need is to give it a bit of a clean, make sure the light seals are intact, replace old batteries and download the instruction manual. Film is affordable and increasingly available. We develop film in our lab on Tuesdays and Thursdays at present.
Choose your film
Film types common to beginners are:
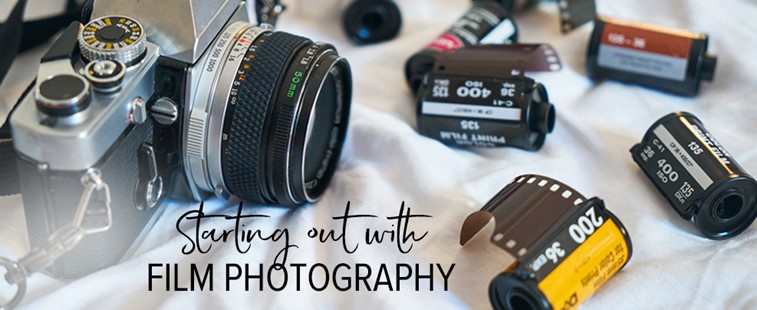
- 35mm or 135 is the standard film used in analogue point and shoot or SLR cameras. The frame size is 36x24mm. The full frame digital camera sensor and the standard print size (6x4 inches) is based on this format. This is a good place to start as the films are more affordable and there are up to 36 exposures per roll so developing costs are less than 120 film.
- 120 (medium format) is a larger format than 35mm, sort of like a larger sensor size if you were to relate it to digital. It’s designed for medium format cameras, giving you lots of detail and good quality pictures. Typically, 120 has less frames per roll than the 35mm films.
There are many choices of film stock to suit your subject. When looking for film, it’s good to know which types have more latitude, meaning the ability to compensate for under or over exposed images. Film in general is pretty good at retaining information when it’s been over exposed. When starting out, it’s always better to over expose than it is to under expose, because highlight details can be recovered easier than shadows in film. We can help you pick the right film, and we’ll have more on film types in a future tutorial.
ISO and “Rating”
ISO or the film’s sensitivity to light is usually indicated in it’s name and by the huge 3 digit numbers on the roll. Usually they are 100, 160, 200, 400 or 800. Sometimes we refer to this as the film’s ‘speed’.
A basic way to remember which speed or ISO to choose is the following:
- 100 – sunny day, bright light
- 200 – partial shade, bright light
- 400 – cloudy day, well-lit indoors, using flash
- 800 – evening, dim lighting, using flash, underwater photos
When you load your film you will tell the camera what ISO you just loaded, usually with a dial on the top of your camera. If you’re using an automatic camera, it will read the code on the film and you can skip this step. This won’t change unless you load a film with a different ISO. This information tells the camera’s light meter what settings you will need to make an even exposure. In a manual camera you’ll need to pay attention to the meter to set your shutter speed and aperture to the correct settings.
You may hear the term ‘rating’ applied to film. This is basically tricking the camera’s light meter by telling it you’re using a different ISO. This could be used to intentionally under or over expose your shots. Film needs lots of light and a common practise is to rate the film at a lower ISO to over expose the image to get a light airy look. Also once scanned, over exposed images can be pulled back and enhanced because the details in the highlights are easier retained. You can use a light meter to do this as well. More about that in a mo.
Use a light meter
You’ve probably seen the hand held light meters photographers used back in the day. These days there are flasher ones available but the principles are simple. A light meter will tell you how much light is available on your subject at the moment you want to photograph it and therefore, what settings your camera should be set at to make the picture at the correct exposure.
Your camera has one built in usually, but if you have one separate you can use it to rate your film over or under and see quickly what settings to use. For example, if you loaded an ISO 400 film into your camera but you want to over expose your pictures by 2 stops of light, you would tell your meter you are actually shooting on a ISO 100 film and the light meter would tell you what your settings are supposed to be based on a 100 speed film.
There are also some good light meter apps available to make it even easier. Get one with spot metering and master those exposures!
Keep a journal
You want to know what you did right, right? And, maybe what you did wrong on some of those frames that at times border on ‘fail’.
Record the film stock and settings used for each shot. You can even take the same picture at different settings to see how these affect the result. This might make fun sound like a lot of work but truly, when you can compare your notes to the results, it will help you hone your skills and not waste any more precious frames.
Slow down
One of the best things about film photography is that it forces us to slow down. In this crazy fast paced world of ‘instant everything’ and the ability to rattle off 100 shots in search of the one moment worth keeping, slowing down and waiting for that moment to happen is refreshing. Not to mention saving time, since you won’t have to sort and cull. Sitting back and letting moments unfold actually enhances the whole experience while you still absorb the moment, remembering it with more of an emotional connection.
Happy film shooting! We’ll bring you another film tutorial soon.